The dialog is used to make a reservation for all requirements in connection with an event. The event is the frame work holding together a number of different components and information.
To enter a reservation, choose a guest or company profile by pressing the button guest search. The selected profile’s details are taken over under the tab client.
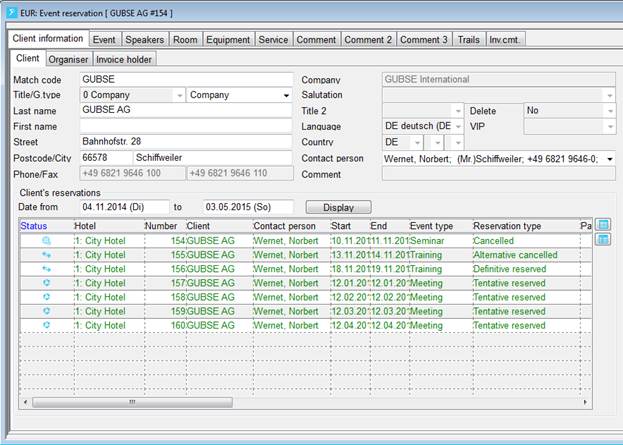
The listbox in the tab client information shows all event reservations over a selected period of time. You can open a reservation by double clicking on the respective line.
Figure 14: Listbox showing the client's event reservations during the selected period
Open the tab event and enter the details of the event. Please note the period entered is the time frame for the entire event including all reservations within. Confirm the entry by pressing the button new. SIHOT checks that all necessary information has been entered and is logically correct. If there are no inconsistencies, SIHOT creates the reservation and assigns a reservation number automatically.
Use the reports deposit control and options control to follow-up on the fields deposit by and deposit in your event reservations.
Now you can enter rooms for this event or edit the event data. Confirm any additions or amendments by pressing modify.
If the check box blocked is ticked, no other user will be able to change the reservation in any way. This function is depending on the user rights assigned.
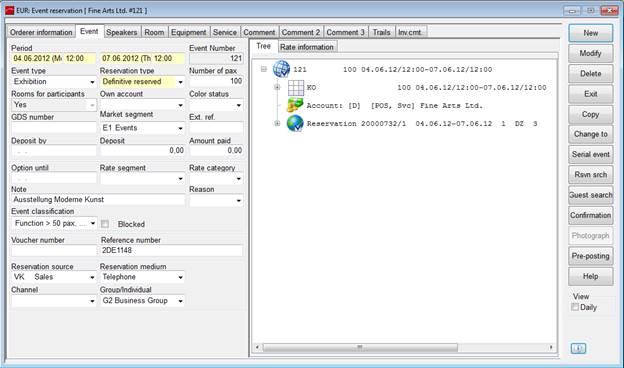
Figure 15: Event reservation
You can open the entire tree with one click via context menu.
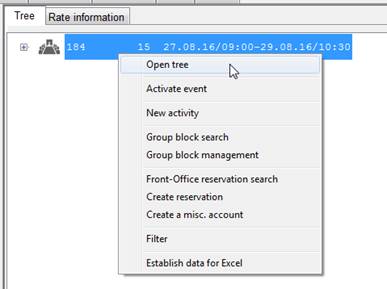
Figure 16: Opening the event tree
Click on the information-icon below the buttons for a tooltip with a synopsis of the reservation’s details.
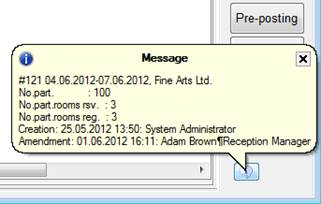
Figure 17: Tooltip with information
The event reservation shows the respective icons if assigned an client who is blacklisted or on prepayment.
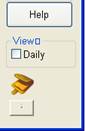
Figure 18: Blacklist and prepayment icons on an event reservation